Planning Your Cabinet Build: Considerations and Construction Methods
A big consideration before starting any major cabinet project is the construction of the actual cabinet boxes. Before deciding on your construction method, take into account the following factors:
- The location of the cabinet boxes
- Which parts will be visible
- Whether they will be hanging or floor-level
- The possibility of adjusting dimensions
- The level of the surface they will be installed on
- Whether they need a kick plate
- If the back or sides will be visible
These factors will influence whether you should use pocket screws, the grade of plywood required, and whether to incorporate stretchers instead of a full back panel.
Let's explore some scenarios to help guide your planning.
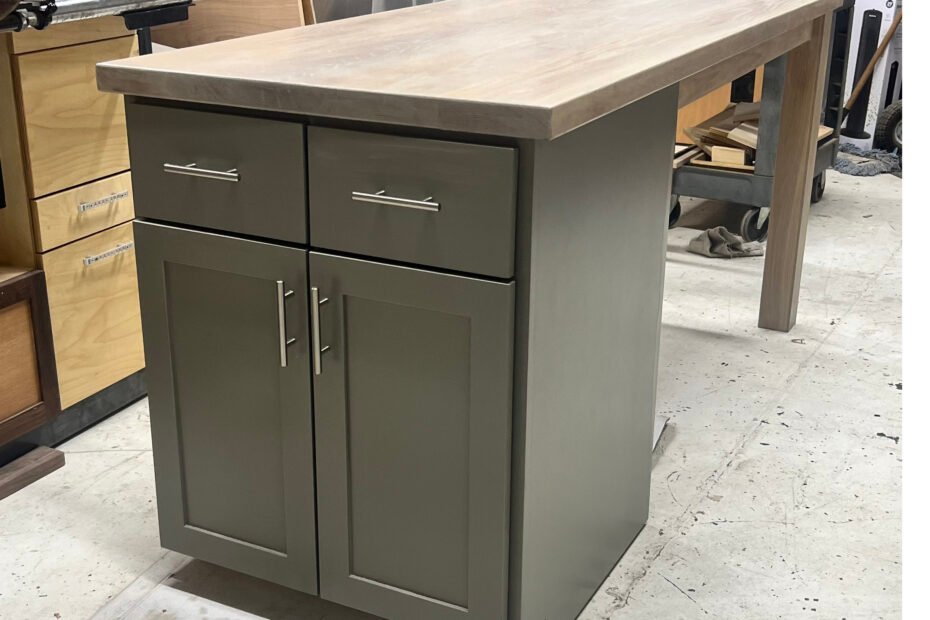
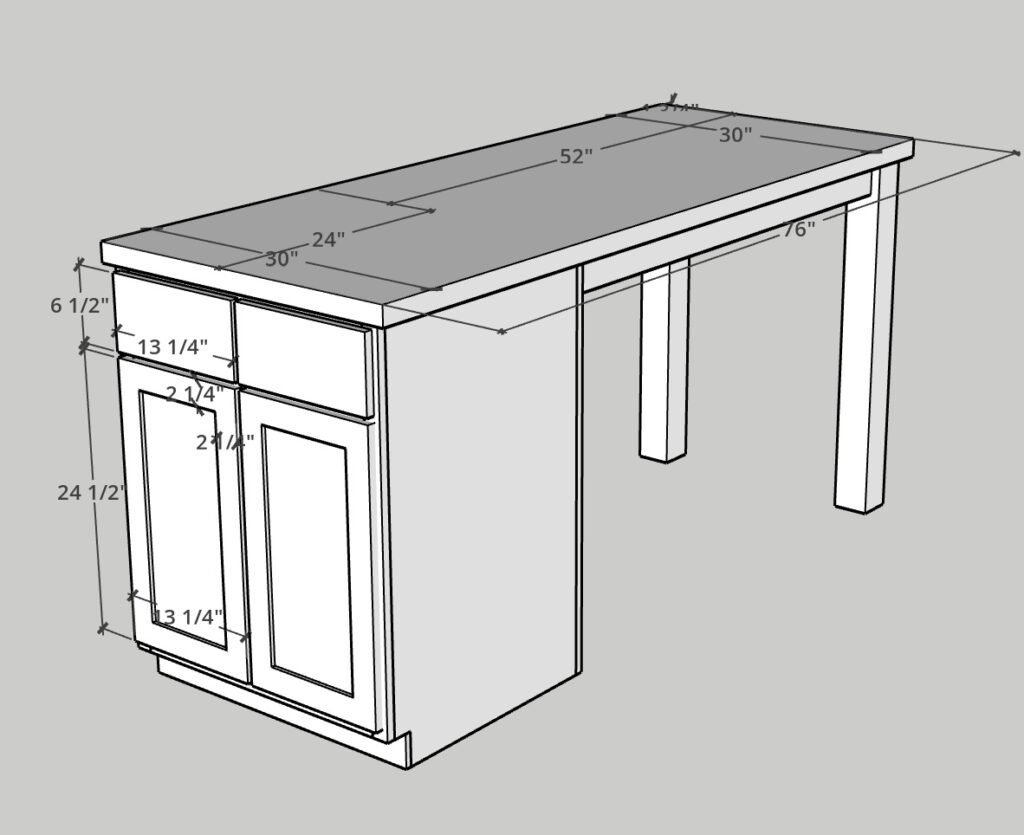
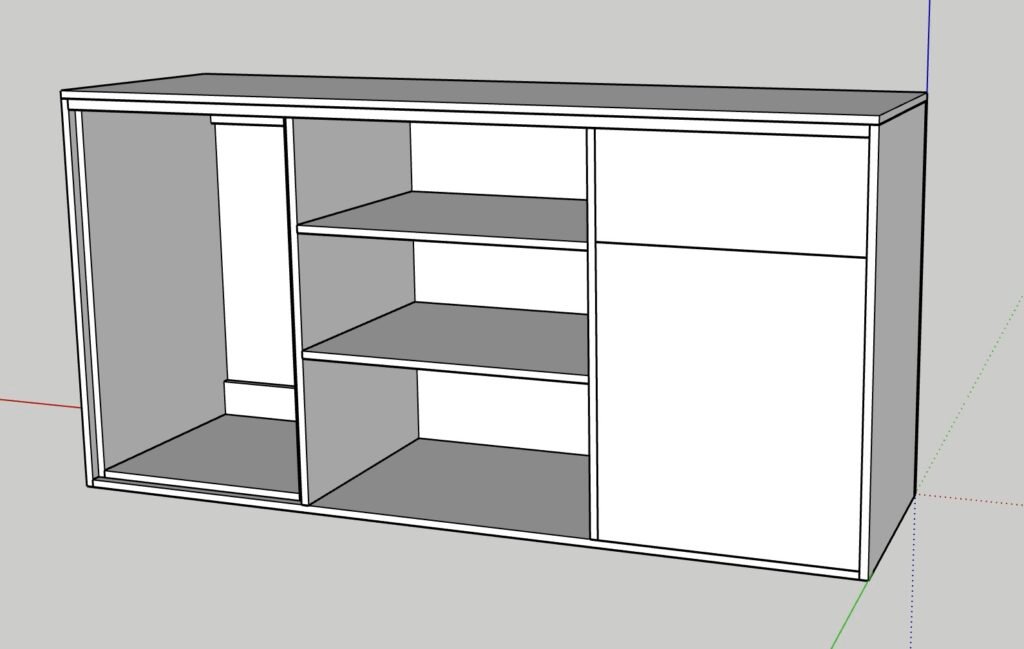
Scenario 1: A Kitchen Island with a Tabletop
For this project, the back and both sides of the cabinet are visible, and the front houses drawers and doors.

Choosing Fasteners
Since pocket screws are driven into the material from the inside, they are not suitable for the back or visible side panels. However, the top will be concealed, so a rabbet or stub tenon is unnecessary and pocket-hole joinery can be used with stretchers.
Kick Plate and Structural Integrity
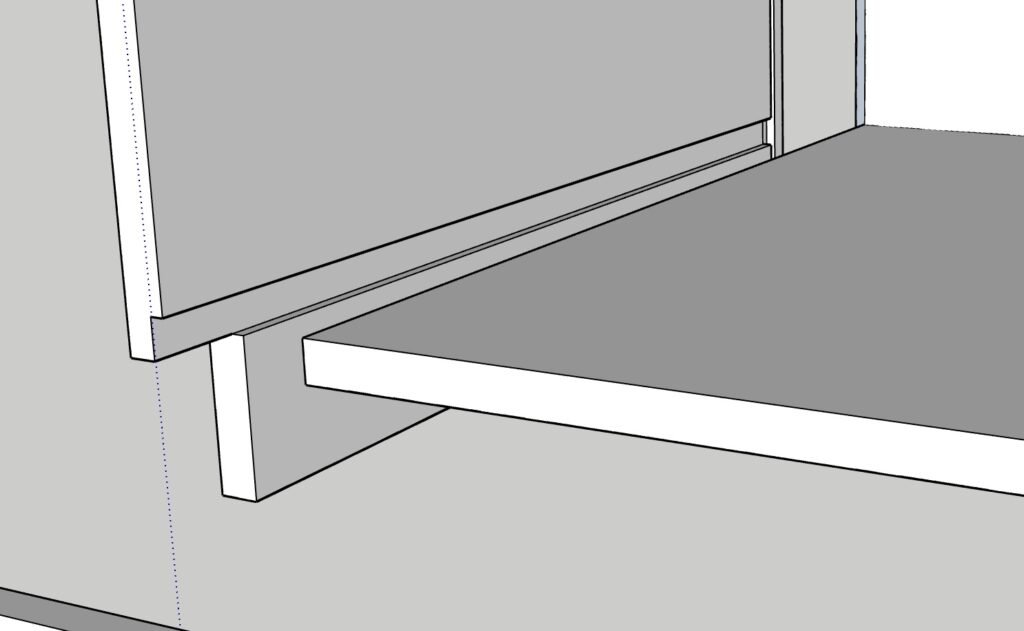
To maintain rigidity, especially as this is a semi-freestanding unit, a kick plate should be integrated from the start by cutting a recess into the cabinet sides. To enhance strength, the back panel should help counteract side-to-side shear forces.
Joinery Choices
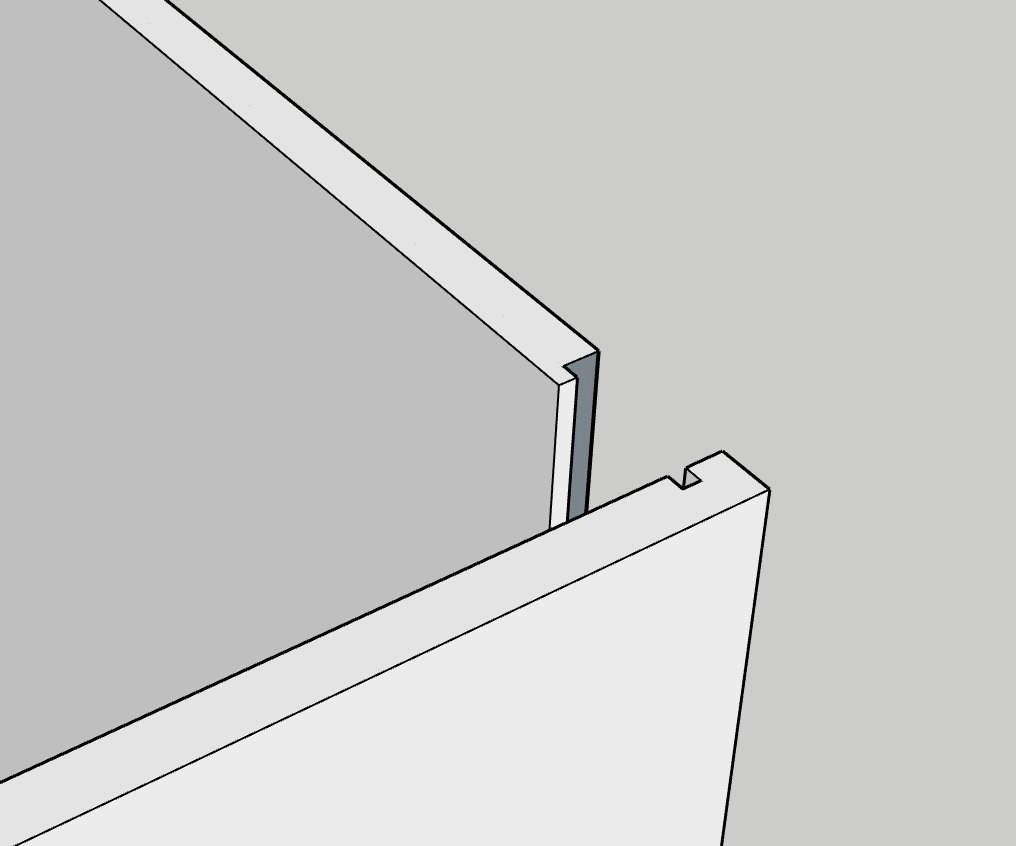
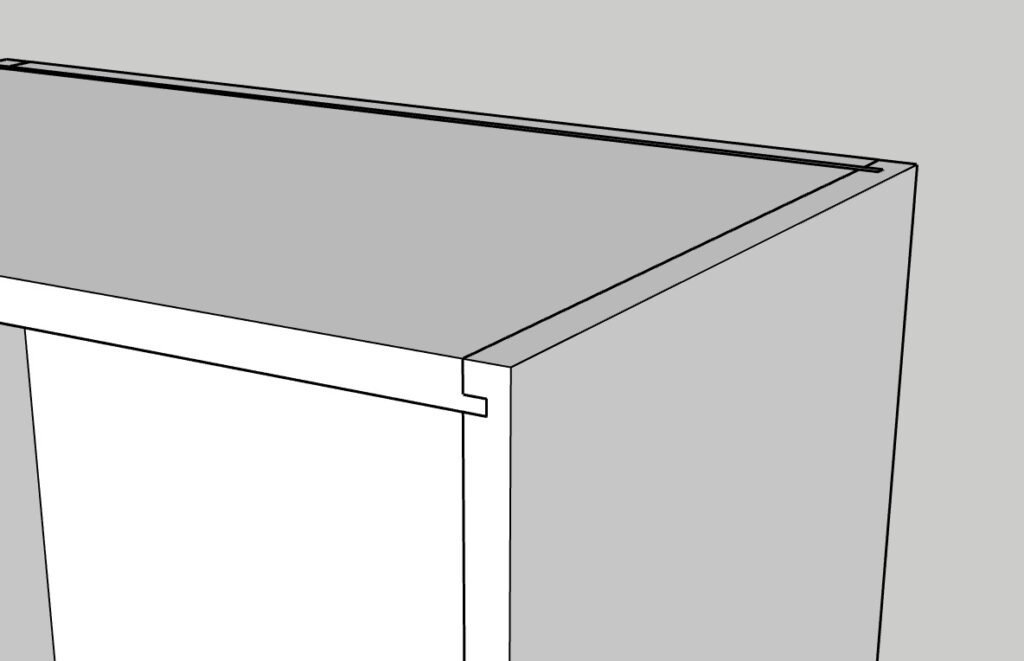
- Dado Joint for the Back: A 1/4” dado, 1/2” from the edges of the side panels, holds the back panel securely.
- Stub Tenon for the Back Panel: A 1/4” stub tenon ensures a snug fit in the dado.
- Reinforcement: A plywood strip on the interior can provide extra clamping pressure while glue dries.
- Bottom Panel: A full 3/4” dado is routed for the bottom panel. Pocket screws on the underside provide additional clamping pressure.
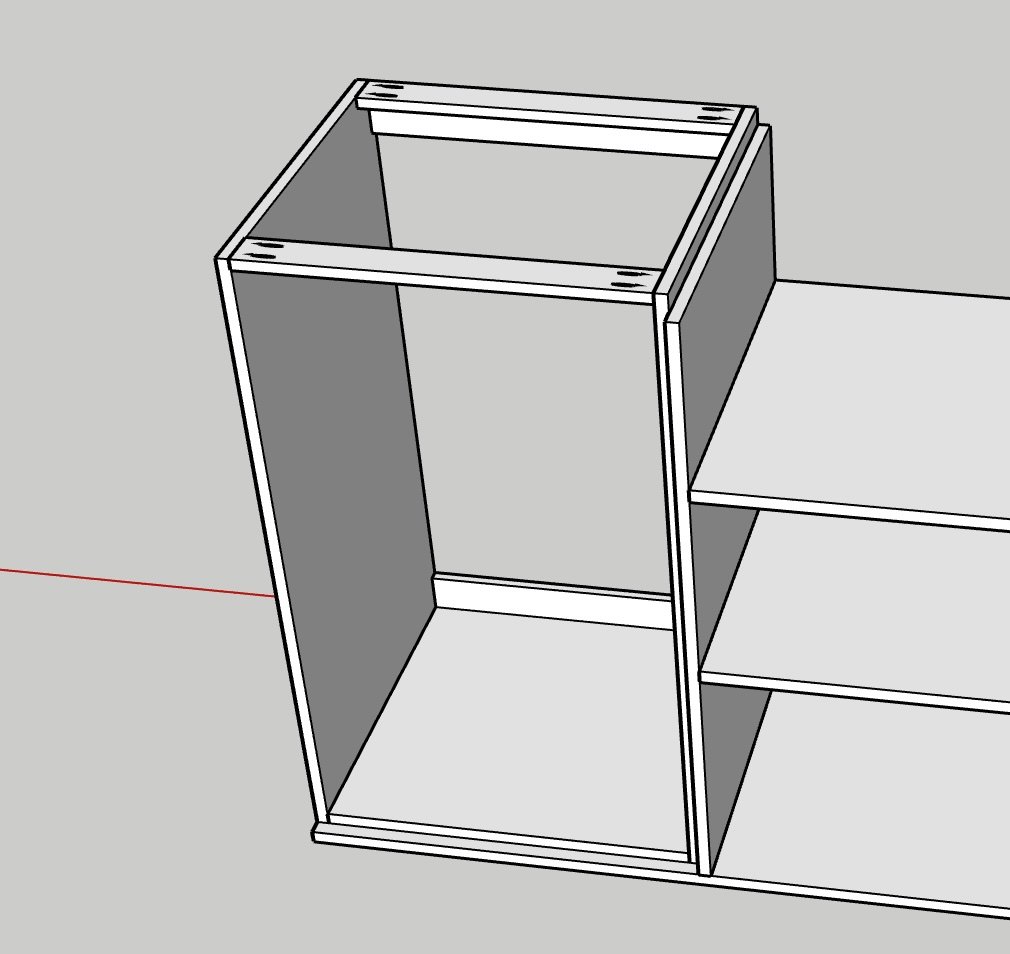
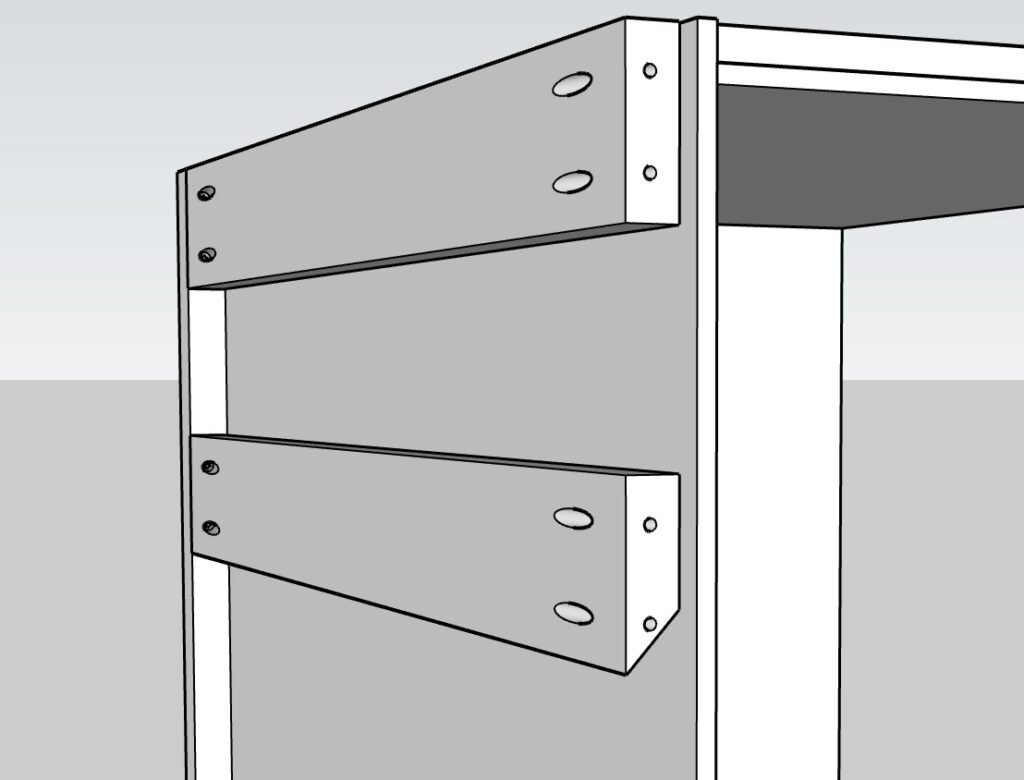
- Top Stretchers: Typically, two 3” stretchers are cut to match the bottom and back dimensions minus dados and stub tenons.
For accuracy, cut the stretchers last, ensuring a square frame. Pocket screws are ideal for stretchers since they allow for adjustments.
Scenario 2: A Standing Reception Desk with Side Cabinets
In this case, the cabinets are structurally supported by the overall desk assembly, so their construction does not require as much independent rigidity.
Construction Simplifications
- The boxes do not have a full back, or top.
- Rigidity comes from being secured to the back panel of the larger piece.
- Joinery can be simplified, avoiding unnecessary mortise and tenon work.
- The assembly can be put together without glue, allowing for easy disassembly and adjustments.
This approach saves time and materials while maintaining structural integrity.
Scenario 3: A Wall-Mounted Cabinet
For this project, the sides will be visible, but the back will only be seen when the cabinet is opened.
Mounting Considerations
A French cleat is ideal for securing the cabinet to the wall. A solid back panel enhances aesthetics inside the cabinet.
Joinery Choices
- 1/4” Plywood Back Panel: Provides a clean interior finish.
- Stretchers & French Cleat: The cleat doubles as a stretcher for added strength.
- Pocket Screws for the Bottom Panel: These can be used on the underside, hidden from view.
- Dado for the Bottom Panel (Optional): Provides additional structural integrity if desired.
Scenario 4: A Built-In Cabinet Run with a Separate Kickplate
For a 10-foot-wide built-in with multiple cabinet boxes, leveling them individually would be challenging.
Solution: A Separate Kick Plate
- Construct a single kick plate spanning the full width.
- Level the kick plate once, ensuring all cabinets on top are level.
- This setup allows for easy alignment and avoids a tedious leveling process.
Conclusion
Building cabinets efficiently requires knowing where to spend time on precise joinery and where to simplify. While pocket screws are useful, relying solely on them may not always be the best choice.
By planning out your cuts and construction methods in advance, you can create strong, aesthetically pleasing cabinets with minimal waste and effort. Consider using a cut list maker to organize your cuts and optimize material usage before you begin construction. Happy building!