
Sometimes creating a seemingly simple thing as a box is a difficult thing to get absolutely perfect especially when you want the lid to have matching grain and almost be invisible when it is on the box.
I have worked out a method that if followed correctly will give you a perfect grain-matched box, a lid that fits like a glove and is almost invisible since it also has matching grain.
Creating a matched grain wood box with a perfect-fitting lid requires careful planning, precise measurements, and skillful woodworking. Here's a step-by-step guide to help you achieve this:
Materials and Tools:
- Wood of your choice
- Table saw
- Miter saw
- Wood glue
- Spring miter clamps
- Router with a straight bit (optional)
- Sandpaper (various grits)
- Wood finish
Steps:
- Select and Prepare the Wood:
- Choose a high-quality wood with a consistent grain pattern for both the box and lid. Check for bow and twist and select wood that is as straight and flat as possible
Design and Measurements:
- If making a small box I like to use wood ½ in or thinner, if you don't have stock that thin don't worry about it.
- Plan the dimensions of your box and lid. Consider the thickness of the wood, the size of the box, and the desired proportions.
Marking and prep
Here is where the magic happens
• Use a square and a marking gauge to mark your stock
• If you don't have those read this article on 5 essential Tools under $50 every woodworker should have
Cutting the dadoes:
We are going to be cutting our lid and inside rabbet which the lid fits over before we glue and assemble the box. The box will be assembled as a fully closed box and then we will cut the lid off to achieve our fit.
We can cut all our dadoes and rabbets while our box is still one piece of wood
- Ideally, you have a piece long enough to get all 4 side of the box
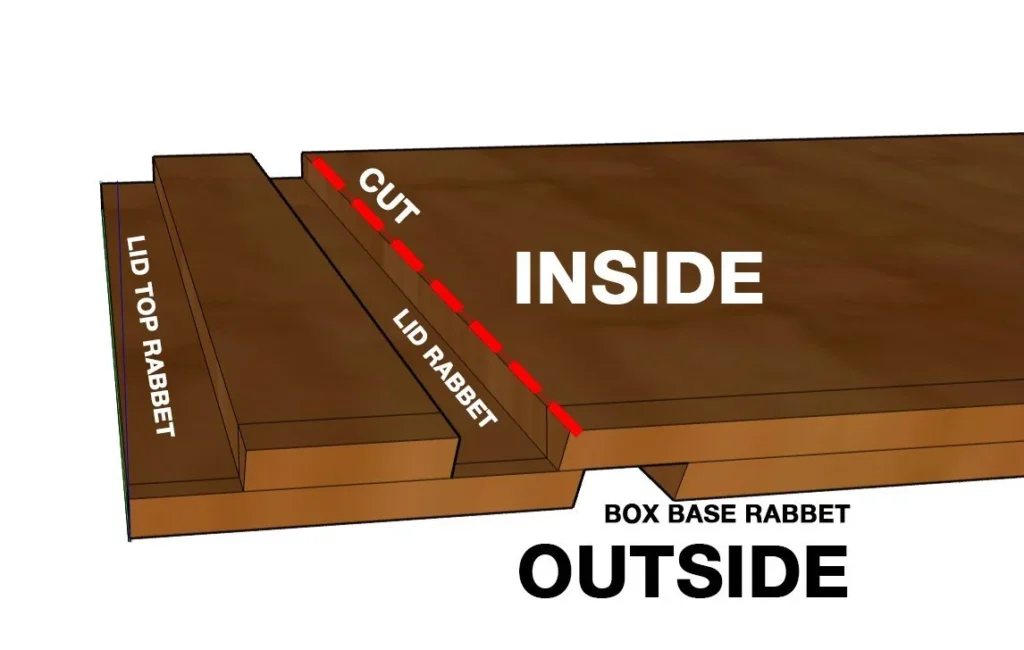
- The first grove we will be cutting is the recess where the top of the lid will sit inside this will be on the inside of the box
- Pro tip: Label you board inside and outside so you do not get confused
- The second dado we will cut will also be on the inside this will be the rabbet on the inside of the lid.
- Important: for the dado you want the depth of the cut to be as close to half of the thickness of the material as you can get it.
- This is how we get a perfect fit since we will be repeating this dado on the opposite side and with some light sanding the lid and base should come together perfectly.
- The Third dado we are cutting is going to be the rabbet on the outside of the box. For this cut we want to place is about ⅛ or maybe a hair more down from our inside cut. If you dont you will cut off the lid section too soon and you need to start over.
- The final cut we are making is also on the inside and it is where the bottom of the box is inset.

To cut the miters. I like to do this on the table saw with a cross cut sled and a stop block but you can do this on the miter saw as well.
Make sure that your saw is a perfect 45 and if anything error on the side of 45.1 so that the tips of your miters come together.
Cutting the Pieces:
- Use a table saw or circular saw to cut the pieces for the box and the lid. Make sure to label your pieces 1, 2, 3, 4 or however you like so you get to keep that flowing grain.
Mitered Corners:
- Cut the ends of the box pieces at a 45-degree angle using a miter saw or table saw with a cross cut sled to create mitered corners.
- Ensure the angles match perfectly for a seamless joint.
Gluing:
- Apply wood glue to the mitered edges and assemble the box. I like to use blue tape to align the miters and keep everything from coming apart.
- I use these little spring miter clamps , and even though they leave a tiny mark you can usually make them disappear.
Lid Construction
- For the lid and bottom, I like to cut and fit them after the box has been assembled to ensure I get a perfect fit.
- Glue your bottom and lid
The fun part:
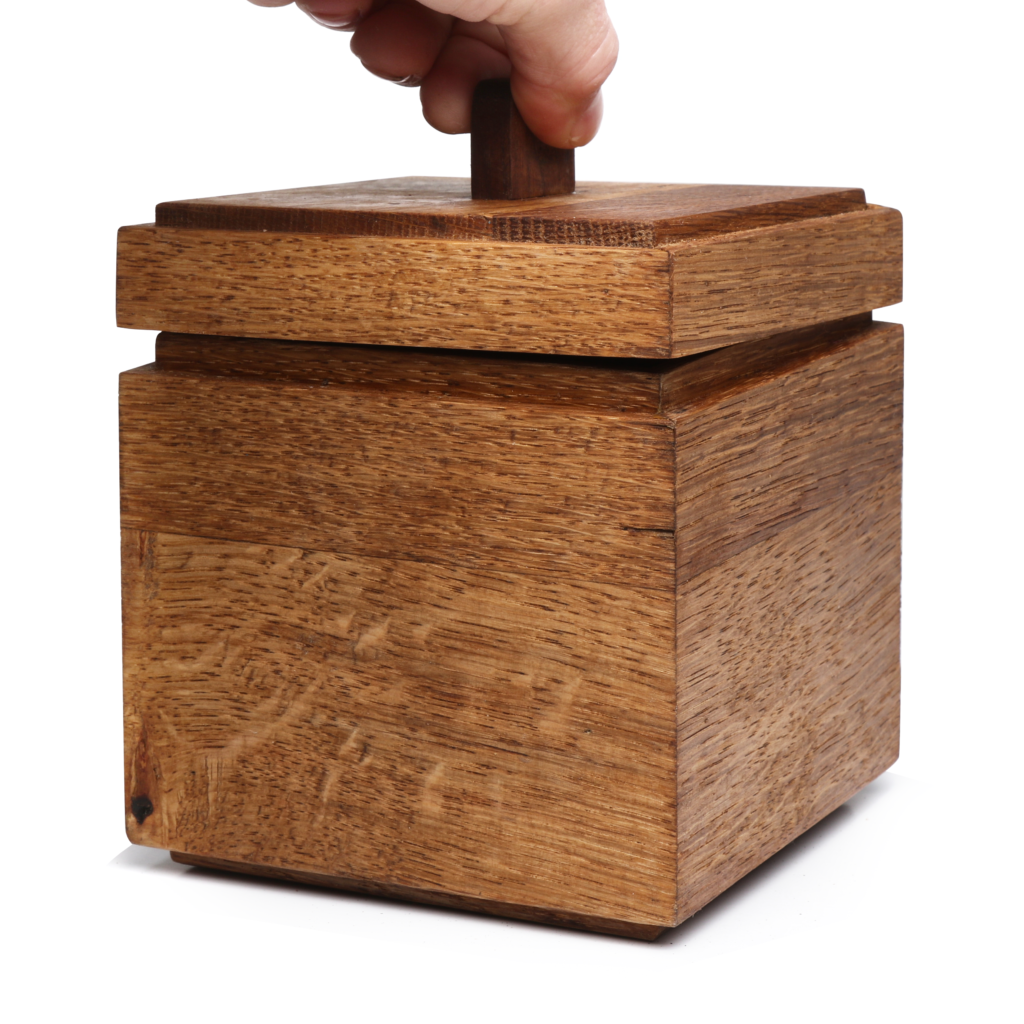
- Now we get to cut open our box and test our fit.
- Lining up your table saw blade to just cut above where our base rebate will cut the lids off and hopefully leave no material to trim or a minimal amount.
Final Check:
- Check the lid's fit on the box. It should be snug but not too tight. Sand with a block and 120 grit sandpaper for the perfect fit
By carefully following these steps and paying attention to detail, you can create a matched grain wood box with a perfect-fitting lid. Remember to take your time, measure accurately, and use proper safety precautions while working with tools.