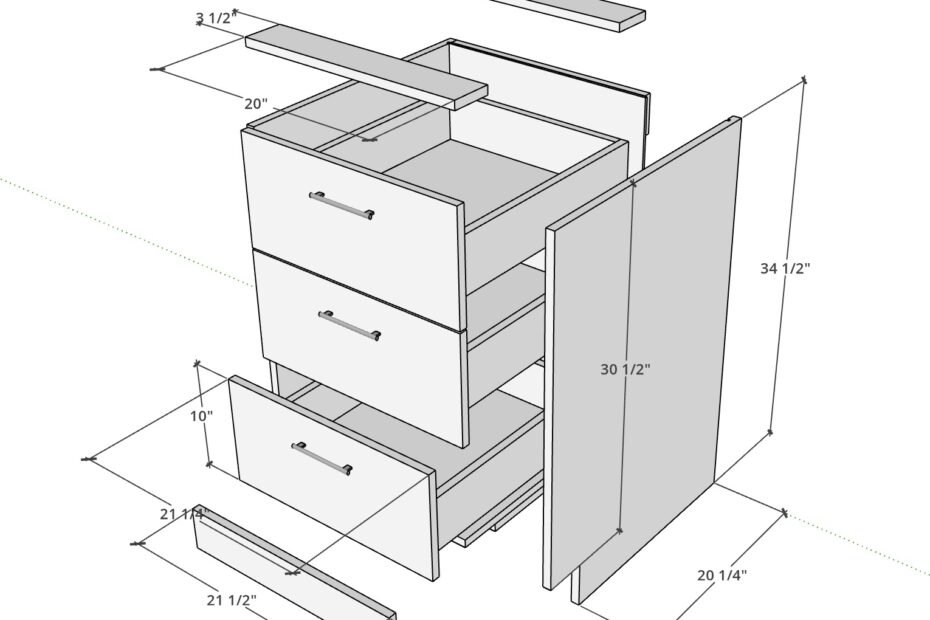
This 3-drawer shop cabinet unit uses exactly one 3/4in sheet of plywood.

This makes it easy to add on 2, 3 or 4 boxes like this if you are making cabinets for your garage or workspace.

This plan comes pre-loaded in CutMaster when you make an account so you can skip the tedious part of inputting all of the measurements for the components.
Shopping List
- 3/4in 4 × 8 plywood
- 1/4in 4 × 8 plywood
- Box (100) 1 1/4in pocket-hole screws
- 3 drawer pulls
- 3 pairs 22in soft-close drawer slides
- Polyurethane Wipe On Finish
Step By Step
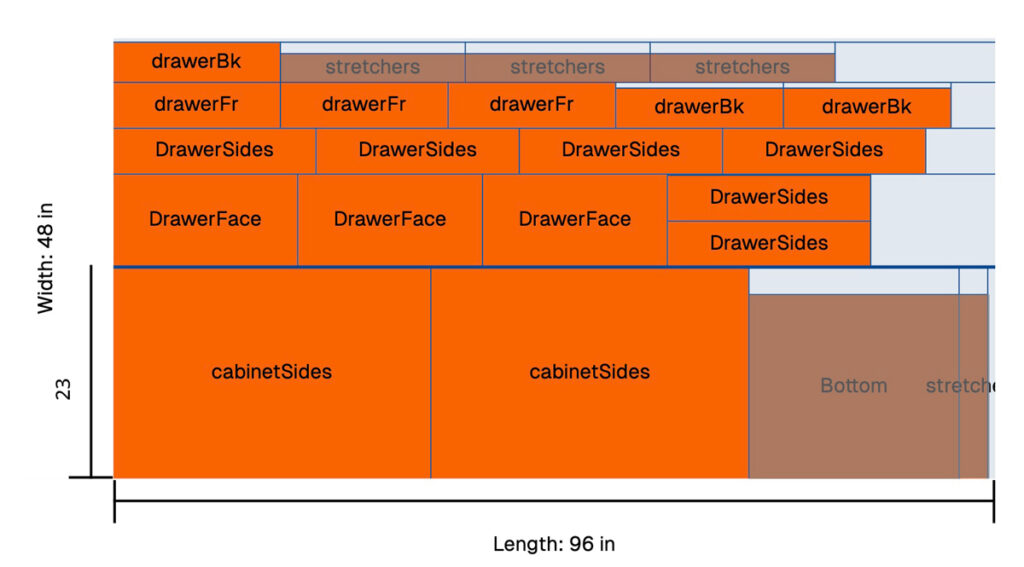
- Start by ripping a 23-inch wide strip off of your full sheet, this first section contains the cabinet body sides and bottom.

2. Next you can rip another piece that will contain the drawer fronts and sides.

3. Rip the remaining strips and label them so you know which components each one has.
Now you can start cutting out your cabinet sides and bottom.
4. Important Once you have your bottom cut out, you will want to match that width exactly for the stretchers
6. Make pocket holes in the stretchers and bottom
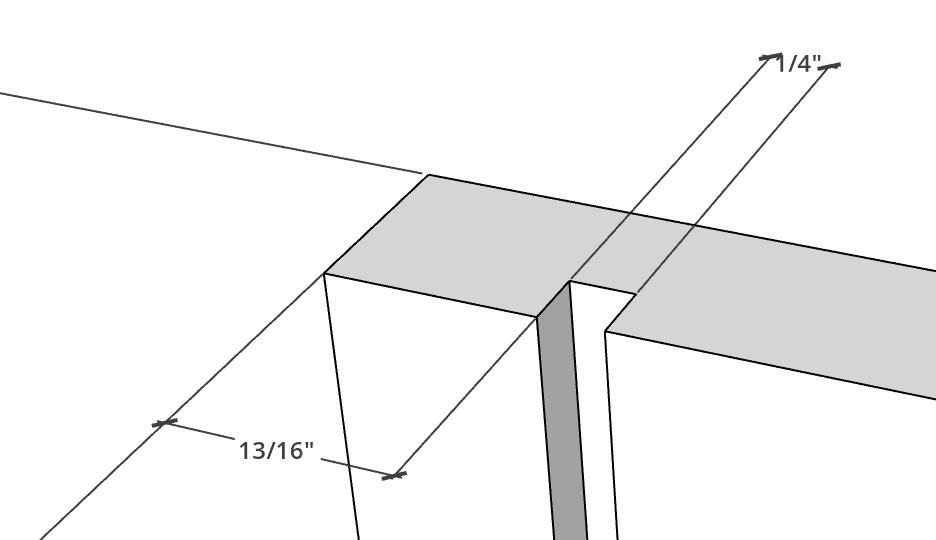
7. Optional: you can choose to add a 1/4 in back to the body but since there will be drawers and the back not visible I would skip this step
8. If you choose to add a back, you can put a 1/4 dado 13/16s in from the back. The extra 1/16 makes sure the back sides in with a little bit of clearance
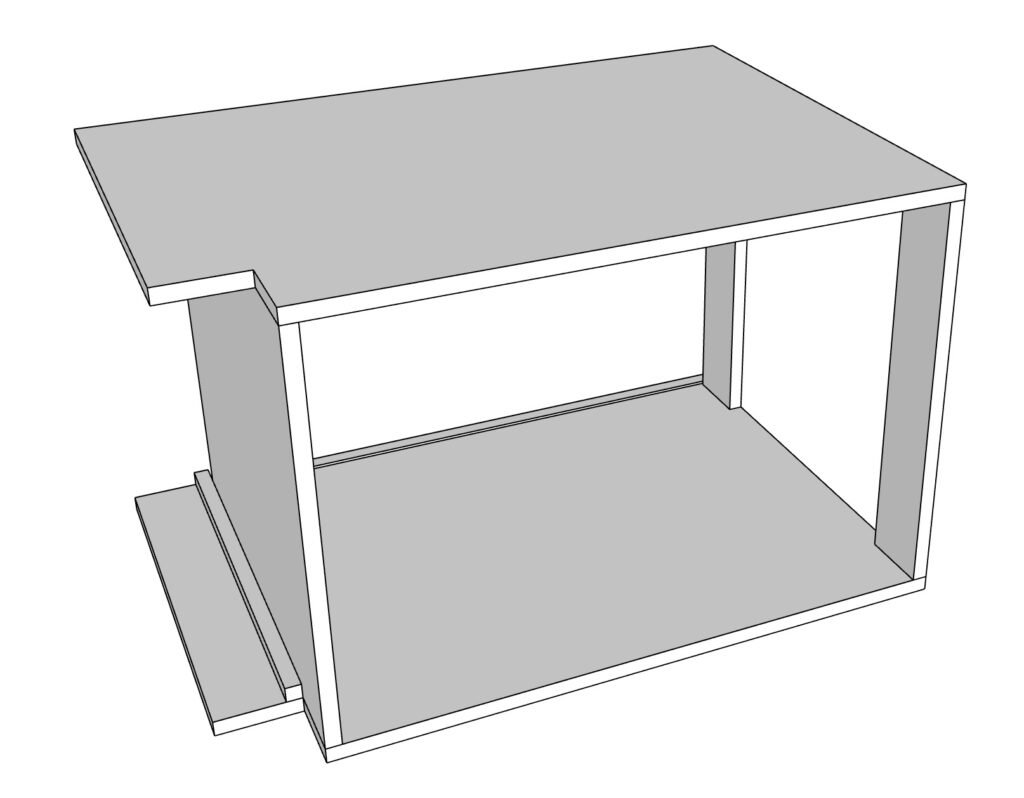
9. Add support strips for the bottom to reference off of and provide additional support.
10. My preferred method for assembling the carcass is to take one of the cabinet sides and lay it flat on my workbench and clamp the bottom in place and attach pocket hole screws.

11. Once the bottom and two stretchers are attached you can set the other side of the cabinet body on top, align each piece, clamp and secure with pocket screws.
12. Once at least two stretchers and the bottom are attached the cabinet body should be rigid enough to put on the floor and finish attaching the remaining stretchers.
13. Before you cut the drawer fronts and backs to width take your side-mount drawer slides and a piece of scrap and set them inside your cabinet body. Measure the remainder and subtract 1/8. This will be the width of your drawer fronts and backs.

14. Cut the drawer fronts and backs, and make a grove 1/4in groove to accept the drawer bottom.
I like to make the drawer bottom removable and so I only have the drawer front accept the drawer bottom in a grove. The bottom is secured to the back with screws so in the case you need to refinish the drawers for any reason it is easily removable.
