It’s easy to overlook hand tools in lieu of the big, shiny power tools that adorn the shelves of major big-box stores. We tend to think that hand tools are inherently more primitive and less accurate than power tools. However, in the world of woodworking, that is not the case. Oftentimes, hand tools can give you the ultimate control and ability to really finesse a tight fit and make small, accurate cuts, especially on small workpieces.
Hand Planes
Hand planes, in my opinion, are the number one underrated tool that every woodworker should have. The uses for hand planes are almost inexhaustible, and if you learn to properly set, sharpen, and tune a hand plane, you will quickly find out how much more efficient it is in certain circumstances when compared to sanding.
The hand plane allows you to control the amount of wood you remove down to 1/1000 of an inch, and when you begin to understand and read the grain on a piece of wood, the hand plane becomes even more of a powerful tool in your hands.
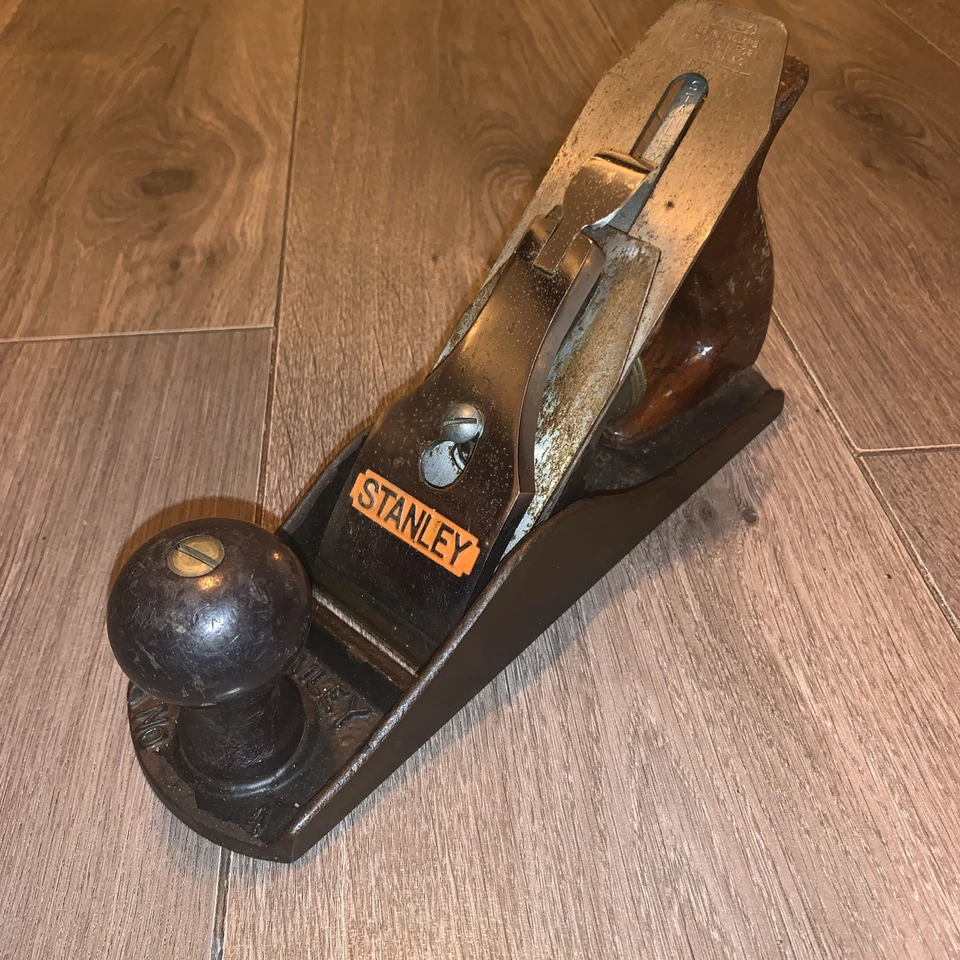
The problem with hand planes today is that if you were to go to your local Miner's hardware store, they will almost certainly have a hand plane made in the new design.
In my opinion, the design should be banned. It is a complete joke when compared to the classic engineering of vintage Stanley Planes.
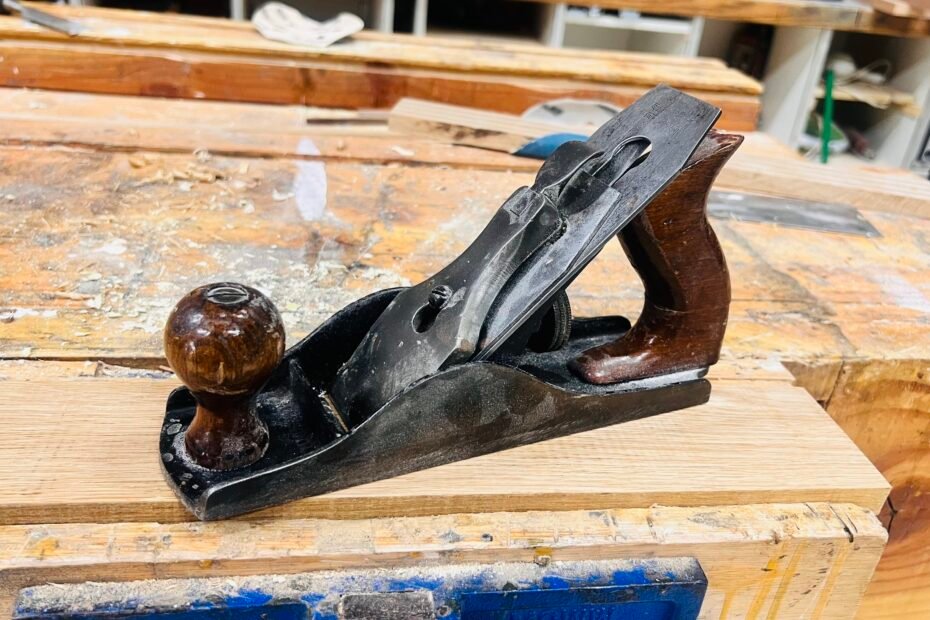
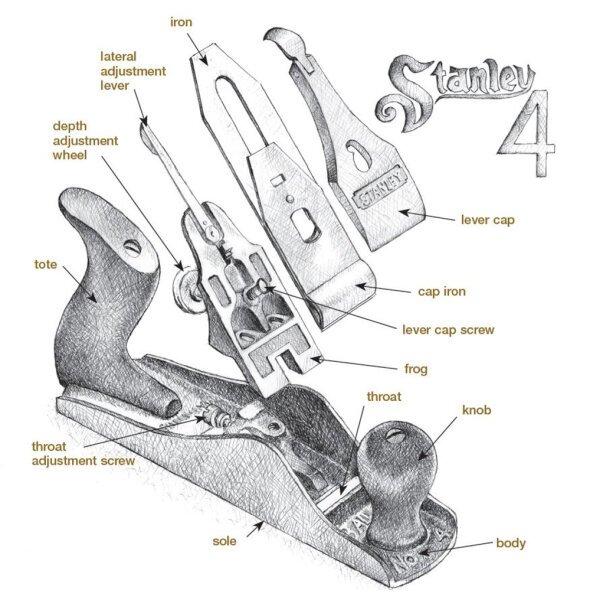
If you are looking to buy your first hand plane, my recommendation would be the #4 Stanley. It is the perfect form factor for being easy to handle. It's nimble enough to be used for edge details like putting a slight chamfer on an edge, and it's big enough that you can easily flatten the face or the edge of most boards.
This is a Sargent brand hand plane but it is almost exactly the same as a Stanley #4
These can still be found on eBay and Facebook Marketplace for $25-50. Don’t pay too much attention to the surface rust, as pretty much all hand planes can be restored and tuned to work like new.
Check out my video here on how to do this.
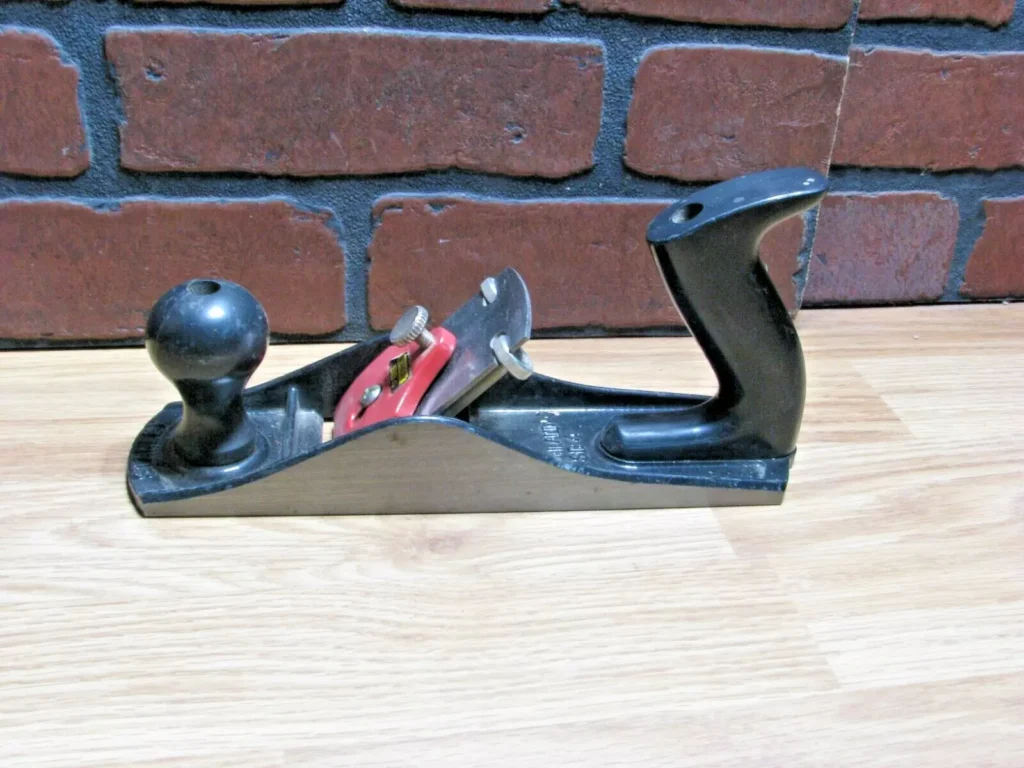
The thumb wheel on the back of this hand plane makes blade projection a single-hand operation that you can do with just your thumb, also the blade angle can be easily controlled with lateral adjustment lever.
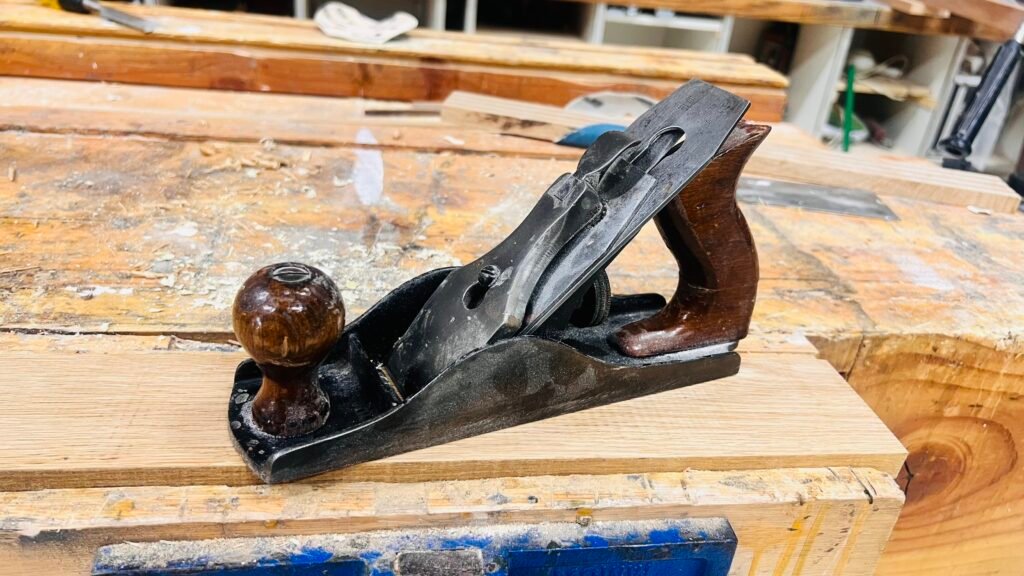
Often times if you are edge gluing two boards together you will have a glue line that needs to be sanded. This is where the hand plane shines as it can make quick work of leveling out any high spots, another added benefit is you do not have any dust to deal with that a sander typically makes.
If I were to choose on handplane to buy it would be the #4 Stanely. Afterward, you can start looking at the #3 and #5 which are also great planes to own.
There are some hand planes like the Stanley #1 that cost thousands on Ebay because they are far rarer, but this rise in cost has much more to do with novelty than it does with quality. The main thing to look for when buying a used plane is that it has all the components intact and that is has the thumb wheel for blade projection and tilt lever for blade angle adjustments. Other brands such as Sargent and Handyman essentially have the same mechanisms that a Stanley will have and will work just as well.
Hand saws
So maybe you have a miter saw, a circular saw and a table saw and you are thinking if I have all these what the heck do I need a handsaw for?
Aren't those just for your grandpa and people who can't afford some nice power tools? Well before you jump ahead of yourself, let's look at some scenarios where a handsaw is not only useful but critical.
- You need to make a small cross-cut on a workpiece that is too large or awkward to move onto a table saw or miter saw.
- You need to flush cut some dowels that you used to cover screw holes
- cutting dovetails or any fine joinery
- making cross cuts on tiny workpieces
There are two main types of handsaws to consider when buying one.
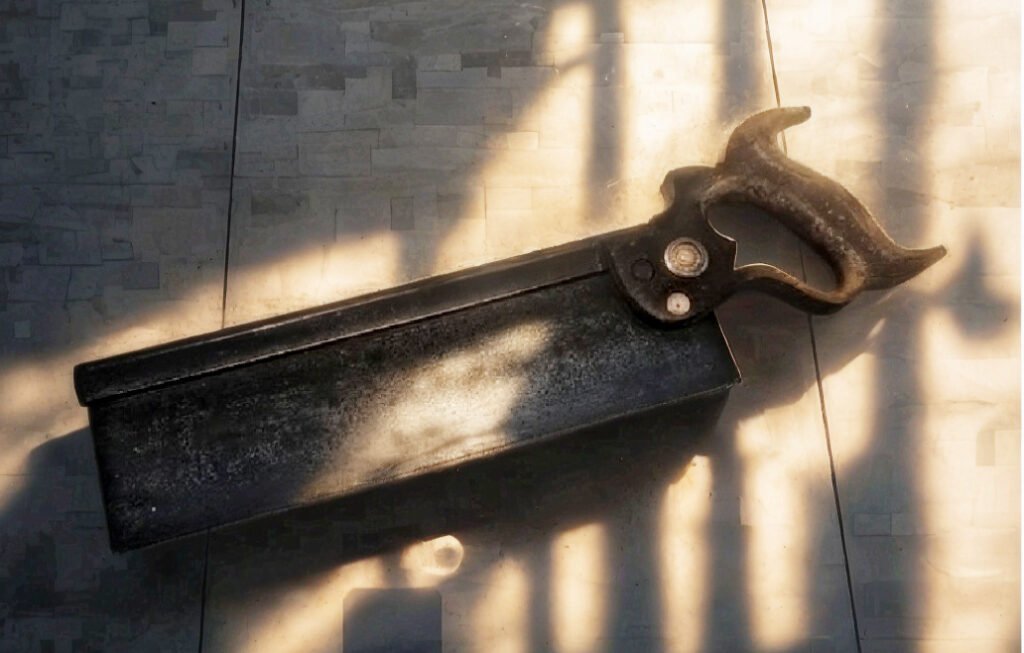
The traditional Western push saw are the ones typically used in England, the United States and the Western world.
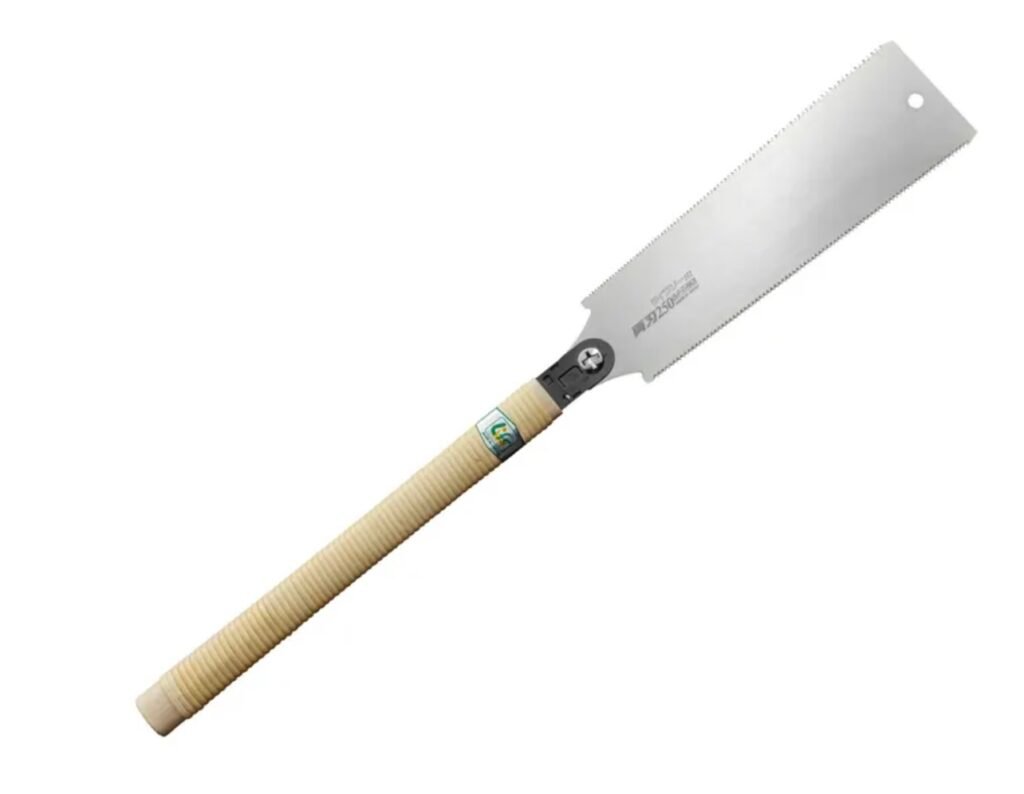
The Japanese pull saw is the style traditionally used in Asian countries.
As the names imply the push saw cuts on the push stroke and the pull-saw cuts on ..... that's right you guessed it the pull-stroke.
The debate goes back and forth on which style is ultimately better. The proponents of the push saw often state that a push saw can generally be sharpened as the teeth and blade are thicker and softer than the metal on the Japanese pull saw.
That being said the blade being thinner on the Japanese pull saw can be seen as pro since the kerf it leaves is very thin.
The kerf on this Dozuki style saw is exceptionally fine which for many people including myself is a big plus to the Japanese style saws.

Another plus to the Japanese style pull saws is that you can get a rip and cross-cut saw combination in one saw.
A few points on the differences between the teeth on a rip saw vs the teeth on a cross-cut saw,
Crosscut saws and rip saws are designed for different types of wood cutting, based on the direction of the grain. Crosscut saws are built to cut across the grain (perpendicular to the wood fibers), delivering clean, precise cuts, while rip saws are meant to cut along the grain (parallel to the wood fibers), making faster but rougher cuts.
Crosscut Saws
- Teeth Design: Shaped like small knife edges, allowing them to slice cleanly through wood fibers.
- Cutting Action: Designed to cut across the grain, producing smooth, accurate cuts.
- Teeth Per Inch (TPI): Typically have more teeth per inch than rip saws, which contributes to a finer finish.
- Best Used For: Cutting boards and panels to length, where precision is key.
- Common Examples: Hand saws, circular saw blades specifically designed for crosscutting.
Rip Saws
- Teeth Design: Shaped more like chisels, designed to tear through wood along the grain.
- Cutting Action: Cuts parallel to the grain, removing material quickly but leaving a rougher finish.
- Teeth Per Inch (TPI): Generally have fewer teeth per inch, allowing for faster cuts and better efficiency.
- Best Used For: Cutting boards to width when speed and material removal take priority over a smooth finish.
- Common Examples: Hand saws, circular saw blades designed for ripping.
Western Push Saws
So maybe all this hype around Japanese pull saws does nothing for you, you are a man of tradition and you aren't going to be persuaded by a new wave of woodworkers who love the cut on the pull. No, no, no, you will be pushing for tradition, bad pun intended. Yes, you want to be like the cabinet makers of old, meticulously sharpening each blade tooth with a file. You dream of passing down your worn patinaed hand saw to your son. You might even be rehearsing the inspiration speech you give him as you explain how the tool has been in the family for generations.
If that sounds like you well then don't fight it, you can make great furniture with the Western saws just the same as with the Japanese saws. You will need patience and time to truly get good at sawing straight and square, but you'll get it eventually.
One thing that makes the Western saws great is that you can keep the same blade and handle for hundreds of years, if you wanted to. That, unfortunately, you can't do with the Japanese saws, you can of course change only the blade, but the Japanese style handles don't exactly cry out beautiful craftsmanship like the old English ones.
The Spokeshave
What the heck is that? Ok if this is your first time hearing that word do not fret.

The humble spokeshave, it's is small, light, and easy to use once you have it tuned and it will last you indefinitely, unless of course you toss it into a molten cauldron of metal, but hey you likely don't pass one of those on your way to work every day so I think you can rest easy.
What does it do? Well, a spokeshave is like a mini plane, but because the sole of a spokeshave is so narrow it can fit into tight inside corners, places where even the smallest hand planes can't dream of going. Think of the spokeshave as a razor, but just meant for wood. The spokeshave is a critical tool if you are working with components that have curves.
Unless you are just so much better than any woodworker I know, the cuts you make on a jigsaw or bandsaw need some clean-up. Well, that's where this little hero steps in. As you get good at sharpening and setting this little tool you will quickly see why it is a classic, from the crisp sound of it taking fine shavings and slowly turning your crooked rough cuts into beautiful flowing curves the spokeshave is a must-have for any serious woodworker and the non-serious ones just as well.
The Sharpening Plate
This one isn't necessarily a hand tool but if you acquire a hand plane, chisels and a spokeshave you better believe that this will be getting frequent use, or at least it should.
Sharpening can seem like a daunting skill to learn and it can be tempting to want to just avoid it all together, and pay for professional sharpening. However, that is not a practical approach at all when it comes to hand tools. The amount of sharpening a hand tool like the plane and spokeshave need makes it a necessity that you learn this skill.
Sharpening 101
Let's take some of the fear and mystery out of sharpening. First of all, it is a skill anyone who wants to, can acquire. While it may take years to hone and perfect it does not take years to initially learn and use so that it is effective and efficient.
What kind of sharpening stones do I get?
Oil stones, water stones, diamond plates?
What grits do I need? 100 200 400 600 800 1000 2000
I'm going to simplify it.
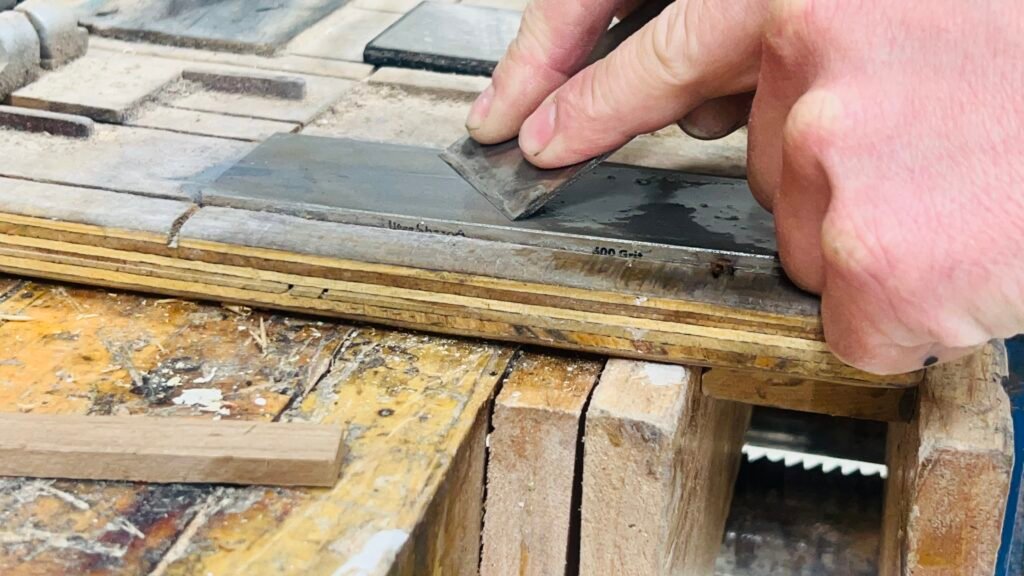
If you have never sharpened anything before and even if you have, buy a 600 and 1000 grit diamond plate.
Why? Because I said so.
Ok but really because with a diamond plate you will not need to worry about flattening your stones or making sure you are not wearing a grove in the center of your stone. Simply put they come flat and they stay flat.
Why 600 and 1000 what about 400 and 2000 and 4000?
I see some oil and water stones go up to these grits.
Here is where getting good at sharpening will be a much bigger payoff than simply having stones in every grit.
I can get a chisel to be scary sharp on my 1000 diamond plate and a strop.
Strop!!! what? don't worry we will get to that, let's just start at the beginning.
You have your 600 1000 diamond plates, they look pretty you could almost pass it off as an anniversary gift to your wife its so pretty. Ok fine they aren't that nice, but still Diamonds for 20! that's a steal.
If you don't make a plate to hold your diamond plates right away don't worry, just put them on a non-slip mat, butted against something or in your vise. If you have some glass cleaner, (I usually get the little bottles from the Dollar Store ), you are ready to go.
Sharpening in principle is a very simple thing, we are simply rubbing a blade against an abrasive material until the edge becomes narrow and free of imperfections divots and dull spots.
The trick of sharpening is to maintain a consistent blade angle at all times. This may seem awkward at first but don't worry.
Start by using light to medium pressure, align the blade so that the bevel is flush on the plate or at a slighting higher angle. This is so we are actually sharpening the cutting edge and not just making the bevel larger and lower angle.
Pro Tip: When you are starting use a Sharpie and color the bevel of your plane iron or chisel in Sharpie, take several strokes back and forth and check the bevel where you colored it in in Sharpie you should be able to see if you are tilting the blade in one direction and if you are applying equal pressure the length of your cutting edge.
Don't rush this, be sure to go slow and relaxed so that the angle of the plate stays exactly the same. If your tools are just being maintained and they never get to the point where any semblance of an edge is gone then you need to stay on the 600 plate for no more than a min if you are using a quick pace.
Examine your blade closely and try to spot if a burr. develops, if it does don't touch it or the cutting edge yet.
Move on to the 1000 plate and do the same thing staying on the plate, making consistent back-and-forth strokes for a min - 2mins. Mark the bevel again with Sharpie if you don't trust that you are maintaining even and consistent strokes.
For the last step and this is a crucial step we are going to be using the strop.
A strop is simply just a piece of leather, but it could be some other fabric in theory, you simply need the piece of leather, or fabric glued to a piece of wood attached in some way. Next, we are going to be using this polishing compound and rub a generous amount onto your strop.
Bear with me as I know what us must be thinking. How the heck is this going to make any difference?
I'm here to tell you it actually does. I was a skeptic until I tried the results before and after the strop and the strop really gives is that razor-fine edge and mirror finish on the bevel. Cool, I know, right?
To use a strop is also quite simple instead of doing the back and forth strokes that you were doing on the diamond plates you are going to only be doing the pull stroke so that your blade is sliding away on the strop this is because you will simple just stab the strop if you try the other stroke. I generally for this in very fast strokes up to 50 times.
Flip over your blade and check out that bevel, if should have a nice shiny mirror finish on it down to the very edge of the blade and most importantly the edge of the blade. You can flip your blade and do 10-20 strokes with your blade almost flat on it. this takes that burr right off and leaves you with a perfect edge.
it is pretty cool, right? And what is even cooler is how well your tools work when they are properly sharpened.
The problem that most people have is that sharpening is not a task they do while in the middle of working on a project rather it is seen as something you need to set aside hours so you can sharpen everything and then just have it work for 6 months. Here is where hand tools are different. A table saw blade can last years without sharpening if you do not use it terribly often. A hand plane, chisel, and spokeshave can't. The metal used on these tools is softer, which is good news because it takes less time to sharpen but it's softer..... which means it loses its edge quicker. If you are using your handplane a ton you will need to sharpen your blade regularly. When that is, is a hard question to answer as it is a very proprioceptive experience that tells you that your blade is not working as well as I could be. This takes a long time to develop but generally speaking if you are wondering if you should stop and sharpen, the answer is a resounding YES. Why? Because if it was cutting perfectly and making that beautiful sound that hand tools make when they are razor sharp then you don't ask yourself whether or not your tool needs to be sharpened. It's only after a marked drop in performance that you wonder.
Woods that just wont plane right
Some woods are notorious for being hard to plane and some areas of wood are almost impossible to plain without tear out and skipping. Here again, is where that feel...... comes in. I know it sounds way to new age to say you gotta feel the wood and listen to what it's telling you. Because actually, that is what you have to do.
You can take your hand and feal for the direction of the grain, careful if your wood is very rough cut, this will get you a splinter in no time. Also, with your first strokes with a hand plane you can generally tell if the direction you are trying to plane in is going to work. Taking a light pass for your first few strokes is a good way to approach it and it ensures your don't get a big chunk of tear out being to aggressive from the start.
Conclusion
Using handtools is not just something for the old timers but something that you will soon find to be quite enjoyable. Many people, m,myself included did not really "get" hand planes until I finally got a decent used Stanley and properly sharpened and set it. I remember the first few strokes with that crisp sound of the blade just taking off beautiful shavings and I instantly thought to my self..... oh now I "get it".
Don't fall into the buying trap that makes you feel like if you don't get the top-of-the-line tools you can't experience the same thing that other woodworkers who have them do. Instead, acquire one humble tool at a time. Learn how it works and how to sharpen it, and your appreciation and enjoyment using it will continue to grow.
Happy cutting!