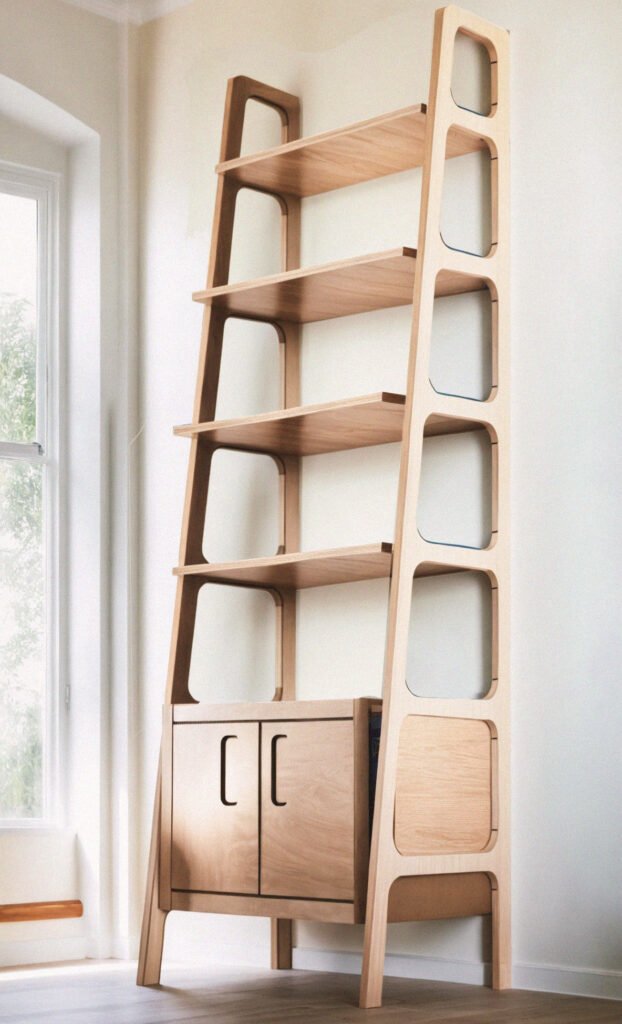
If you want to step up your skills by using a router template and adding some tapers and curves this is a great project to get your feet wet and it also helps that it looks great. You could modify the bottom cabinet and add shelf pin holes and a few shelves as well. The template for the curves are printable, and can be used to create the initial template make from some scrap plywood you have.
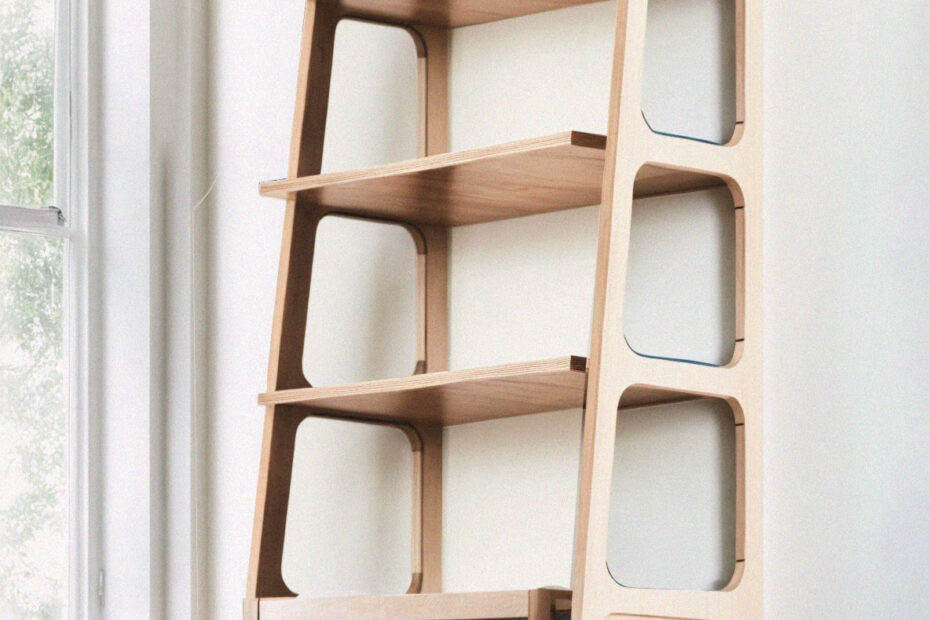
If you use a high quality baltic birch the exposed edges make for a unique style and work well with a modern or Mid Century Modern aesthetic.
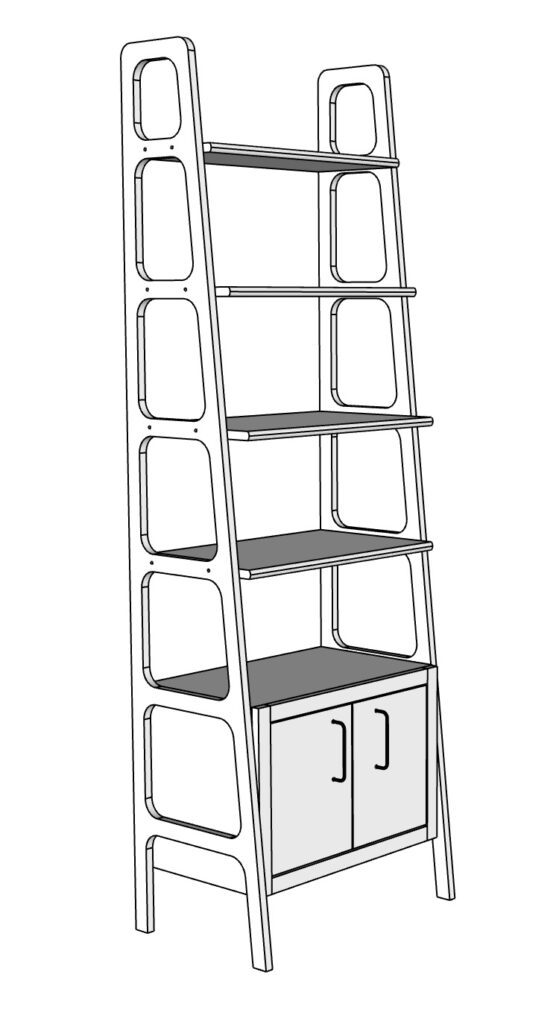
What are the dimensions of the bookshelf?
This bookshelf is 16 deep at, 76in tall and 24in wide. is 72 inches wide. This sizing is totally adjustable and, with the included SketchUp file, you’ll be able to adjust the bookshelf to suit your needs.
Tools Needed
- Table Saw
- Circular Saw
- Router
- Pattern Bit
- Polyurethane, or oil of choice
Shopping List
- 3/4in 4 × 8 plywood
- 2 in philips head screws black
- Box (100) 1 1/4in pocket-hole screws
- 3 drawer handles
- Finish of choice
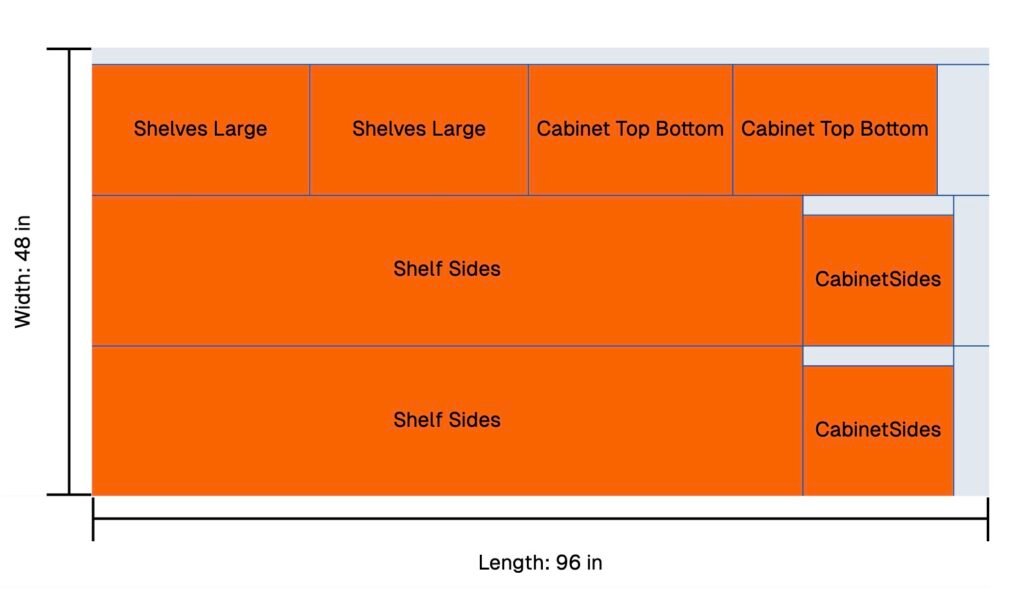
Cut List
If you prefer to lay out your cuts on a printable sheet, I have a free Printable Plywood Layout Sheet available here.
| Qty. | Length | Width | Thick | Grain | Label | |
|---|---|---|---|---|---|---|
| 2 | 16" | 137/8" | 3/4" | None | CabinetSides | |
| 2 | 76" | 16" | 3/4" | None | Shelf Sides | |
| 2 | 213/4" | 137/8" | 3/4" | None | Cabinet Top Bottom | |
| 2 | 231/4" | 137/8" | 3/4" | None | Shelves Large | |
| 1 | 231/4" | 117/8" | 3/4" | None | Shelf Mid | |
| 1 | 231/4" | 97/8" | 3/4" | None | Shelf Small | |
Step By Step
Step 1: Rip a full 96in long, 33in wide piece off of your full sheet. Then, rip down this piece into two pieces 16in wide and 76in long.
Step 2: Mark the taper, (8 1/16in from the waste side), on both pieces and clamp a straight edge to your strip, make both cuts.
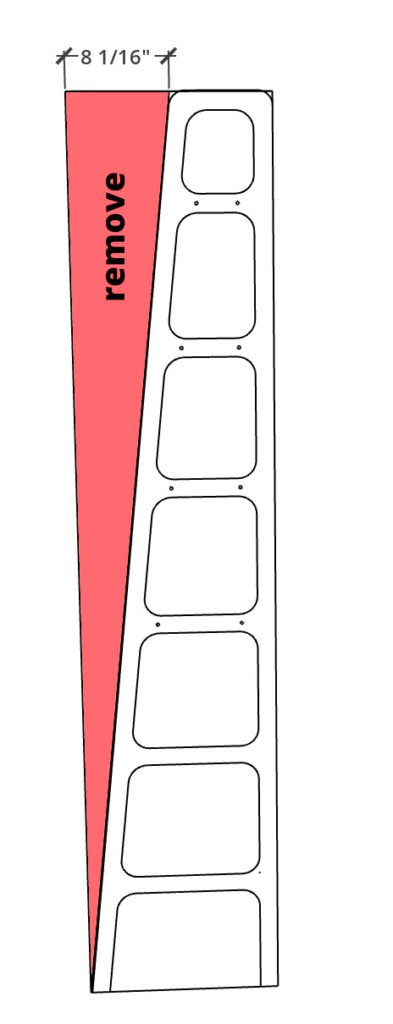
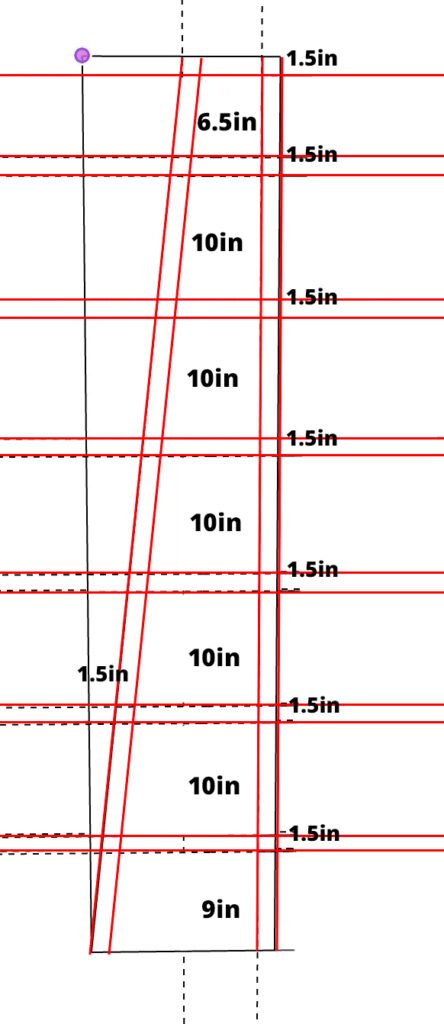
Step 3: Next mark 1.5 in from both sides, each opening is 10in tall except for the first (9in) and the last (6.5in). Make the layout as pictured.
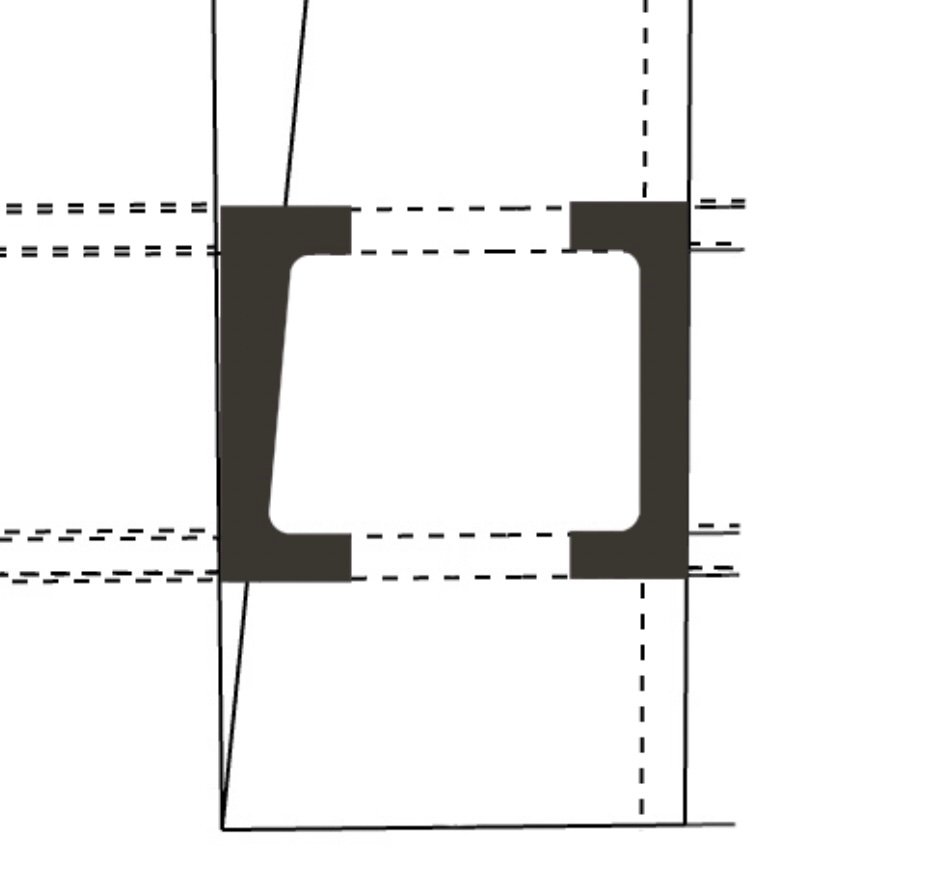
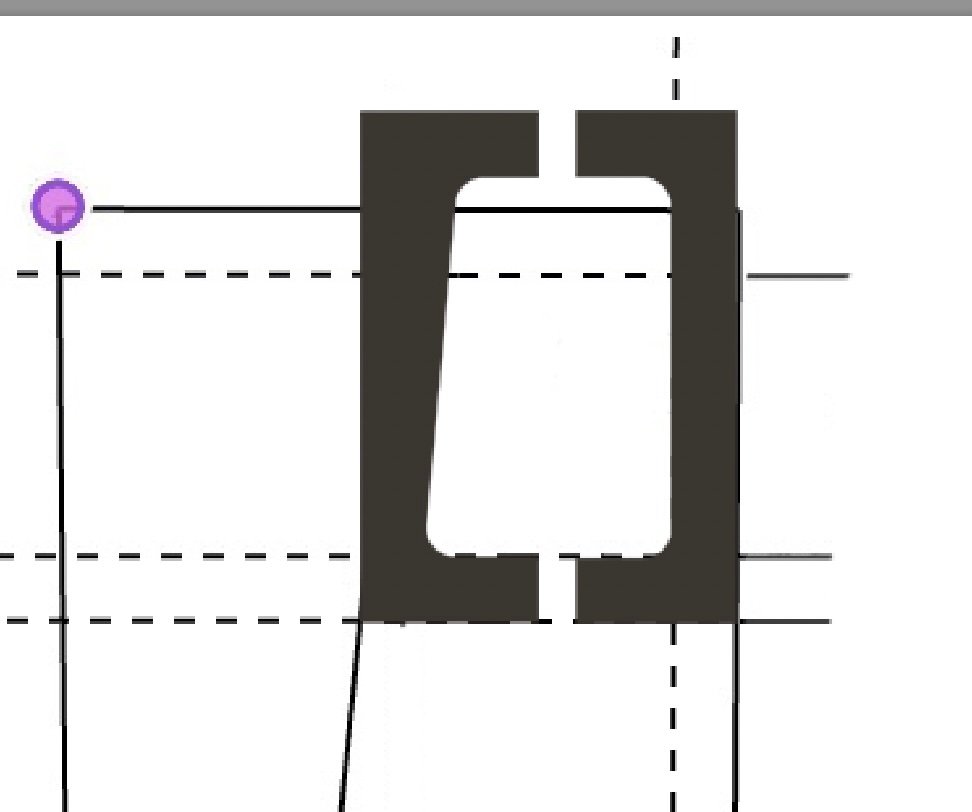
Step 4: Use the template to mark out radius curves. The template comes in this print out and is meant to be made in two pieces so that it can be used for the widest openings as well as the narrow ones at the top.
Create a curve template for both sides of the opening. Curve Template Left. Curve Template Right


Step 5: To cut the straight lines in between the curves first rough cut leaving about a 1/4in then use a flush trim bit to clean up cut.

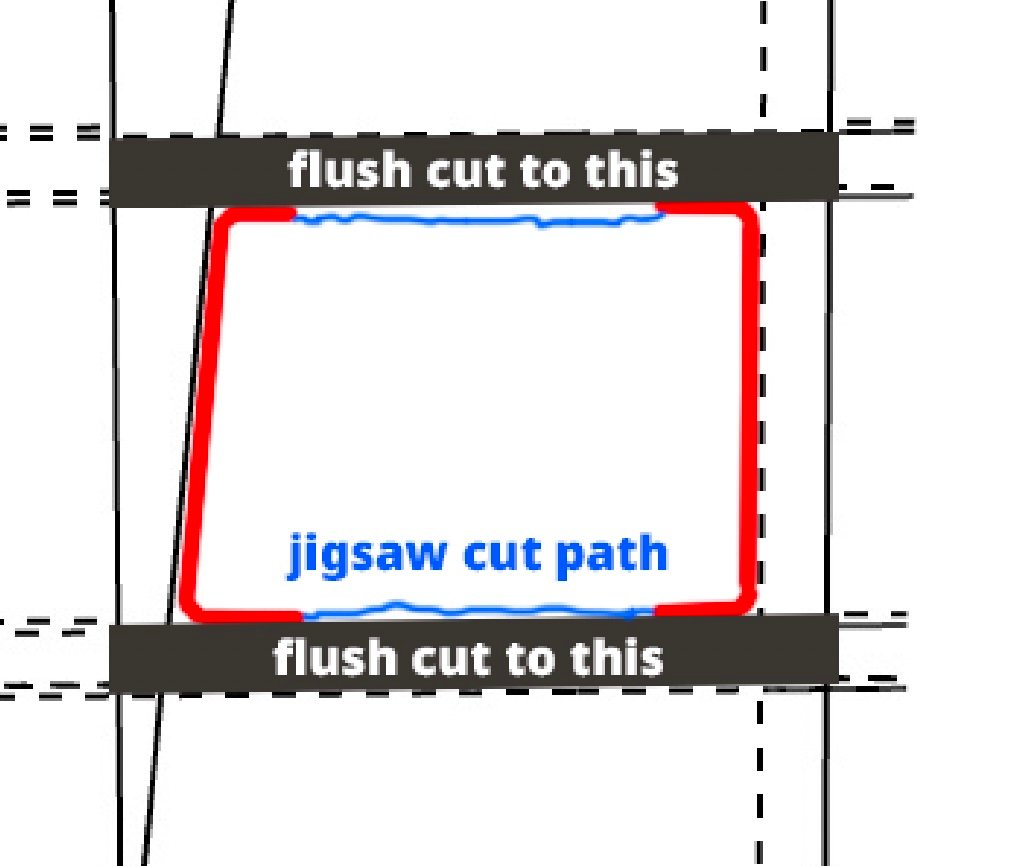
Pro Tip: Use one side and pattern bit to cut out the second side, this way the two sides match perfectly.
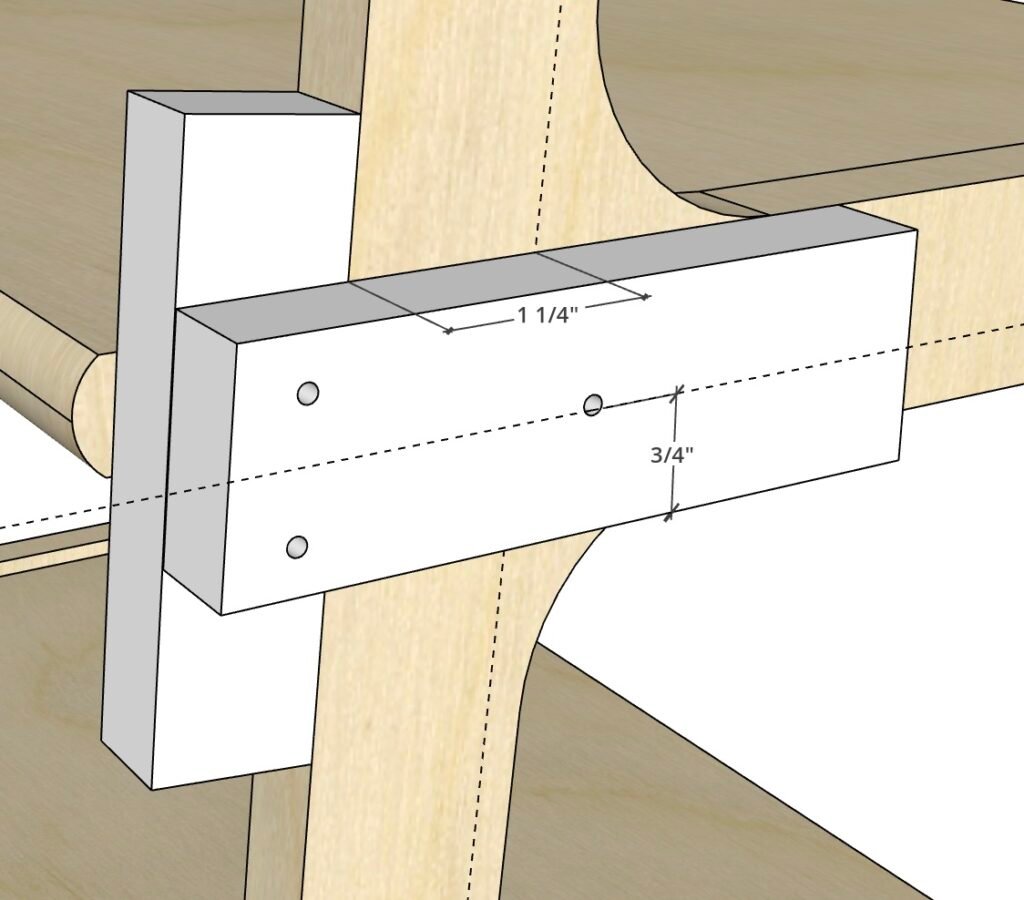
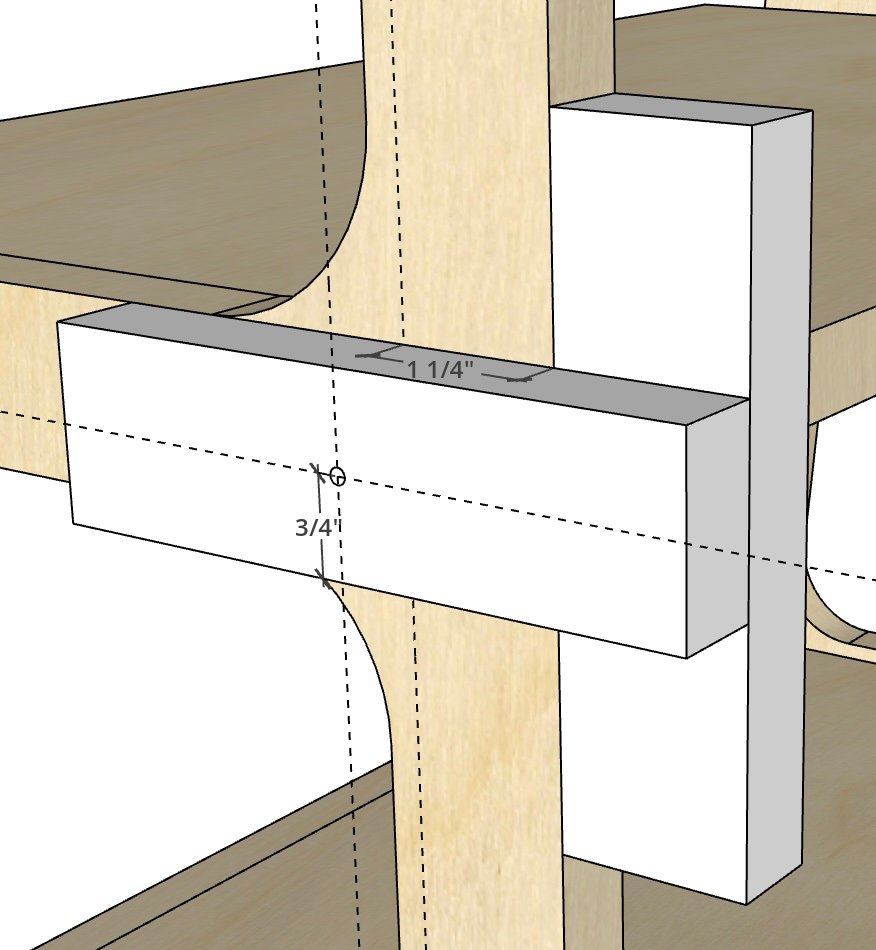
Step 6: Create a hole jig and drill appropriate holes. Make the template piece 1.5in wide so that you can reference it to the section between the openings.
Step 7: Make the following cuts for cabinet body assembly and shelves. Plan is drawn to use pocket screws to attach bottom to cabinet sides.
| Pieces | Length | Width | Thickness | Grain Direction | Name | |
| 2 | 16" | 137/8" | 3/4" | None | CabinetSides | |
| 2 | 76" | 16" | 3/4" | None | Shelf Sides | |
| 2 | 213/4" | 137/8" | 3/4" | None | Cabinet Top Bottom |
Step 8: Assemble cabinet body and sides, sand to 120-220 grit and finish with your choice of polyurethane, hard wax or oil.
Use scrap pieces of plywood as a spacer between the floor and cabinet body. Secure cabinet body from the inside.